Archive for November, 2011
Hitting the lip – this is the most essential part by miles
November 27th, 2011
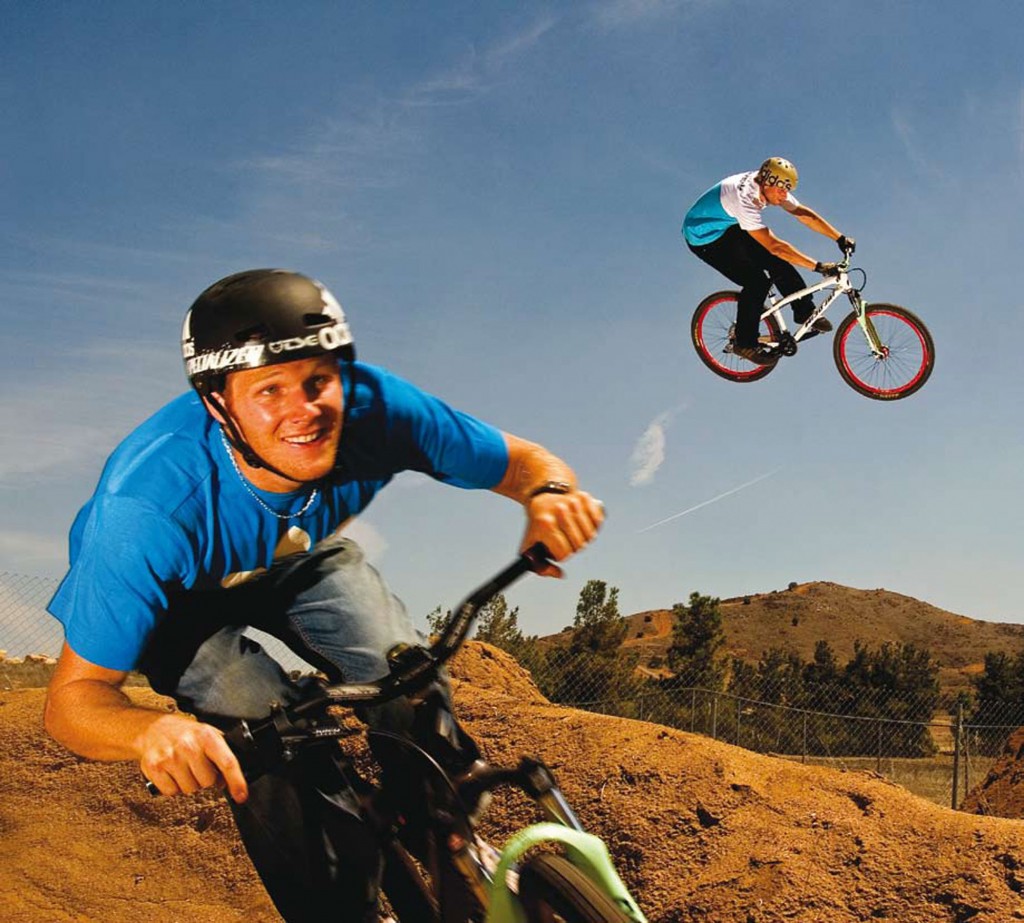
Getting it right while you’re still on the ground will make the airtime part easy. Although you may be thinking about the jump as the take-off and landing, add the few metres before the transition into your thoughts. You need to be planning and setting up a few bike lengths before the lip so that when you get there, everything is done already. One of the hardest things to master is learning the concept that, the less you do, the easier it’ll become.
Stick on your favourite film and watch any top rider; you’ll see that they rarely yank on the bars and spring off the lip like a gazelle having a seizure. Instead, the transition from dirt to air is seamless. The line and arc should begin on the take-off and carry on through the
air and onto the downslope.
On the run-in, spot your take-off point. That should usually be the highest part of the jump. You need to try and make sure both tyres reach this point of the jump before they lift off. Hopping off the transition too early will only cut short your airtime and bring you down heavily with no flow. By keeping an eye on this point, it should be easier for you to gauge your speed and get the timing of all your movements’ right.
THE PUMP
Hand over as much work as you can to the trail. The more you can get from the dirt, the less you need to do yourself. Pump the compression before the jump starts to rise. If you’re coming in fast, you might not have to do too much, but if you’re rolling in slow, exaggerating the pump with your arms and legs will add height and distance to your jump. The pump can also add stability to your riding. The more planted you are on the ground, the more confidence and balance you’ll have so don’t let yourself get all light and off-kilter before you even get to the lip. As with most general trail riding, the bike is better stuck to the ground than it is skipping over the top.
SPEED
The pace you hit the jump at can be tough to gauge to begin with. Start slow and build up on tabletops, where the consequences of coming up short aren’t as severe as a double. The more jumps you hit, the more you’ll understand what’s going to be needed to get you the distance. Technique can also play a part. The more proficiently you pump, the slower you’ll be able to go and still clear the gap. If you can only reach the downslope of a small jump by frantically pedalling at the take-off then something’s amiss. Go back to the basics and refine your flow, balance and pump.
LIFT OFF
Now that you’re approaching with the right speed and you’re solid and in balance, you can start to work more on the take-off. Pumping should have moved you slightly down and forwards to load the bike – like coiling a spring. Now you need to release that pent-up energy by following it up with a gradual move backwards. The lower you move from, the more balance you’ll have so recruit your hips into doing most of the work. Keep in mind that unlike a manual, where you do all the work, most of the effort will come from the physics of that spring, so keep all body movements very subtle.
If you were to roll your bike at the lip without you on it, it would take off on its own so all you have to do is make sure you’re not loading the front wheel. All it’s wanting to do is take off – so just let it. As the 19th century proverb says, less is more.
BACK UP
The rear end needs to mirror what the front has done only hundredths of a second earlier. As the lip is the take-off point, keep your weight off the front until your back wheel has rolled up the transition and is now at the same spot. This can seem difficult, but in actual fact it’s pretty simple. Just like you took your weight off the front by moving backwards, you should now take your mass off the back end by moving forwards again. Too much and you’ll either start a front flip or nose dive into the landing, too little and your rear tyre will stay planted on terra firma. It’s a fine balance, influenced more by your timing than by how much you’re moving. Subtlety is key, so keep the movements minute.
AIRTIME
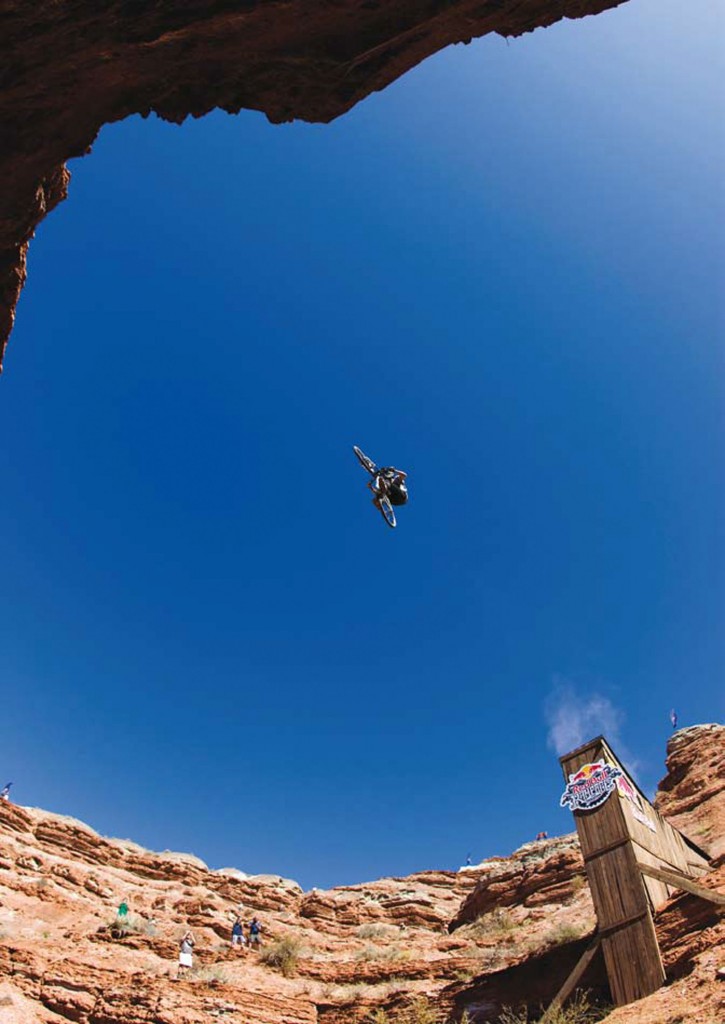
If you’ve done all your jumping using the lip and the trail that precedes it then this part will be effortless – just like in those movies. It’s the hang-time you’re now experiencing where you can spot your landing or start trying tricks. If you feel like you’re holding the bike in the air, chances are you’ve gone for the old faithful yank on the bars and need to re-think your take-off. The pedals you’re using shouldn’t make a difference at this point. With the weight shift back and forwards, the bike wants to take off underneath you and will be following the path you set it on at the start. If the bike is dropping away from you, it’s back to the drawing board and time to re-master your take-off. Don’t take the easy option and fit a set of clipless pedals, they’ll only restrict you later on.
POP
We’re not talking Britney Spears here. The pop you get from the lip is the result of a number of things. As McCaul says, “You might have to bunny-hop more off the lip if you need more height than it’s going to give you.” In this sense, exaggerating the boost you’re going to get from the jump will require you to do a bit more work. It’s not worth trying this until you’ve got mellow, relaxed jumping dialled as the timings and techniques are a little more complex. Initiate the entire movement from the pump and use this compression as the trigger for all your other techniques to follow on from. On the approach get stable and central with your pedals level, push hard into the compression with your whole body weight and as you take off carry out the same moves as before but with extra effort and power.
The bunny-hop can be introduced nearer the lip to squeeze that little extra from the height but make sure you’re still using as much of the transition as possible. Try and let your moves be dictated by the shape of the ground rather than just pulling a monster bunny-hop off the top. It won’t get you that far and will win you zero style points at the same time.
This post was taken from: Mountain Biking The Manual by Chris Ball
Backhand across the face – A successful backside attack begins with your bottom turn
November 25th, 2011
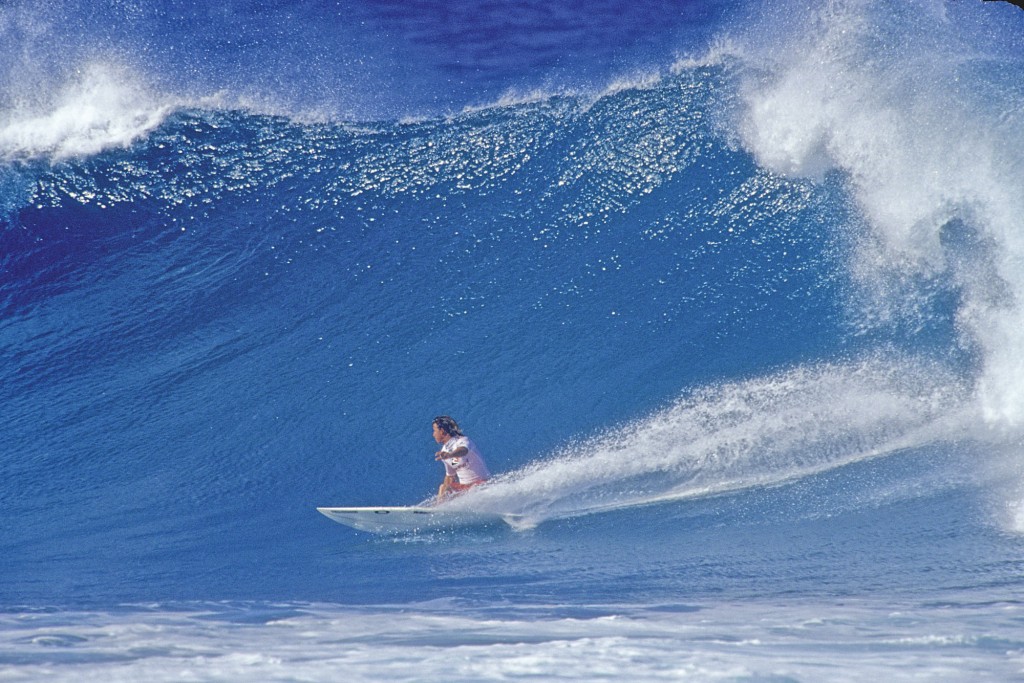
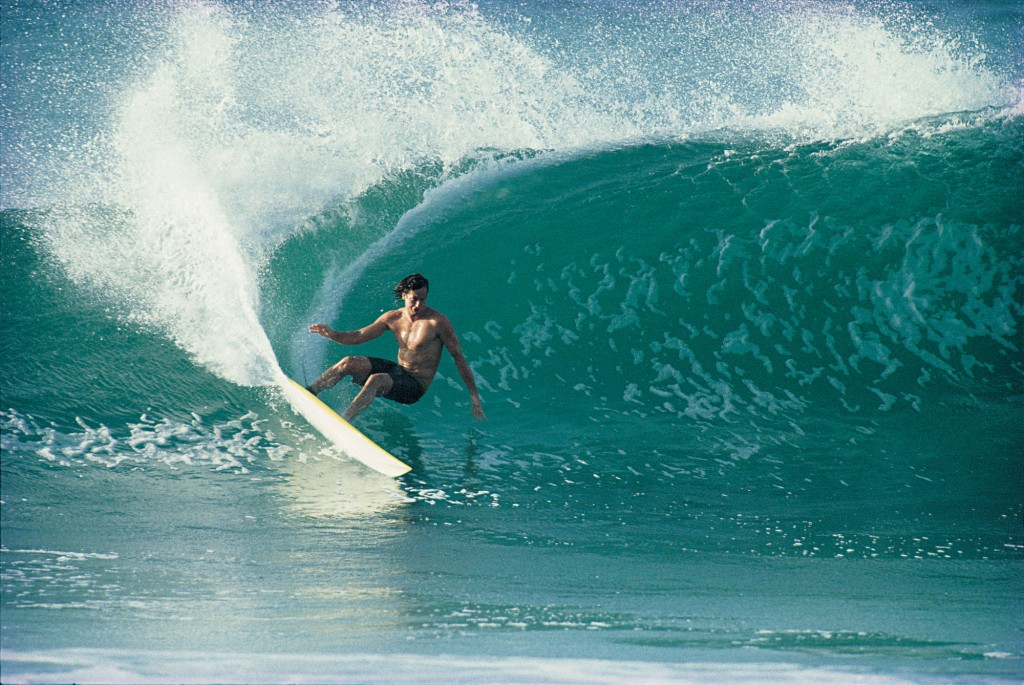
Your ability on your backhand begins and ends with the proficiency of your bottom turn. And while, in terms of projection and speed, the basic physics behind a backside bottom turn are relatively similar to a frontside bottom turn, it’s the mechanics that are completely different. Frontside bottom turns are considerably less technical for the simple fact that when you commit to the turn, you’re facing the wave.
There’s much more of an unknown factor when you’re setting things up on your backhand, and there’s no better place in the world to study this than Pipeline. Watch the best frontside surfers there, and you’ll notice that they practically fall into the pit, waiting for the ocean to throw over them before setting their rail.
There are very few long, drawn-out turns. But backside surfers don’t have this luxury; they have to rely on experience, instinct and one hell of a bottom turn. Either one of the Irons brothers serve as a perfect example. Bruce Irons stays low over his board, grabs his rail, sort of sideslips under the hook and about halfway down the face engages his inside rail and fins. This sets him up for the tube almost immediately, which allows him to sit far back on the foam ball from the beginning to end of his ride.
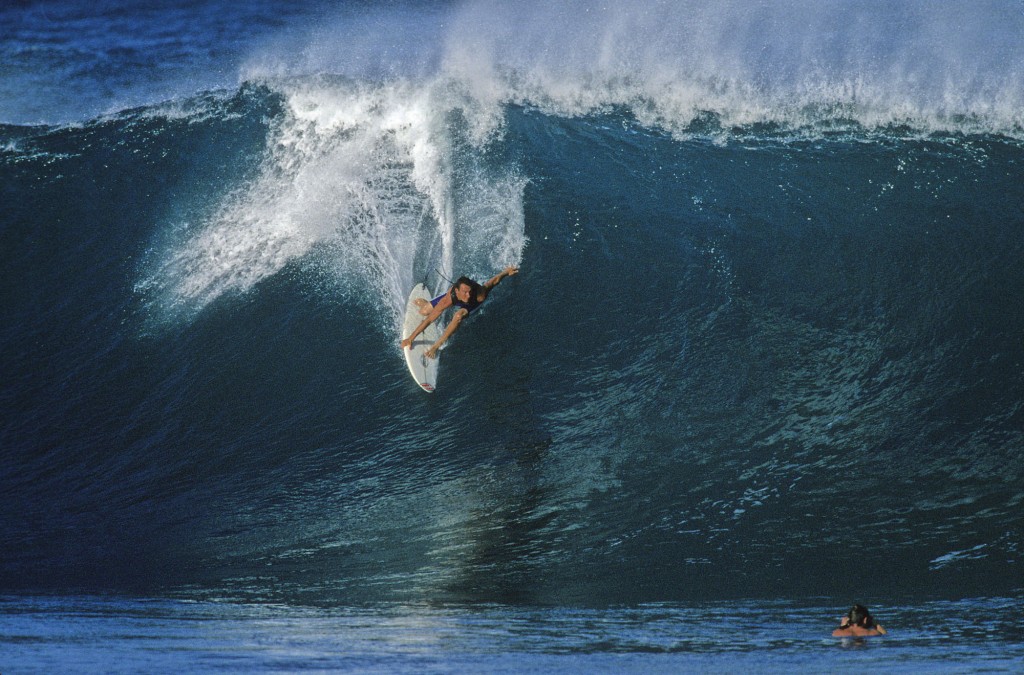
On the other hand, Andy Irons will often drop straight down the face, and as he starts to get to the bottom of the wave really leans into the turn, and depending on the situation, he either projects out of the turn and down the line, or picks a more straight-up path into the pocket.
Considering Bruce and Andy are both Pipe Masters, either approach is more than suitable. But before you go hucking yourself over the ledge at Pipe, you’d better understand the fundamentals first. Here are a few ideas to get you thinking:
The Approach
As with every other maneuver in surfing, a good backside bottom turn starts with your ability to successfully make the drop. Of course, there are exceptions. On particularly fast, racy waves, you’re going to want to angle across the face, so as to not get stuck behind the section. But if you’ve got some open room to roam, you should try and stay as straight and close to the power zone as possible.
The Turn
Start your bottom turn the instant you reach the flats and at the point of maximum speed on your drop. “Get low and lead off your front foot,” says Mark Occhilupo. To begin your bottom turn keep your knees bent, lean on your heelside edge, and turn your upper body in, looking over your front shoulder. This will initiate the turn and allow you to see the lip in front of you. It’s here that you’ll be able to decide whether you want to crush the lip or drive down the line. Your weight should be evenly distributed between your front and back feet. Ride through the beginning of the turn without dragging your heels in the water in order to maximize your speed. It is very important to keep your original line through the turn so you don’t lose any speed. Try to pick the right line from the beginning, maintaining one long, flowing arc. If you’re really pushing the turn it should be almost like you’re sitting in a chair, your butt just a few inches off the water’s surface.
The Next Step
When you begin to go back up the wave, transfer most of your weight to your back foot, and drive up the wave face to gain the maximum amount of speed possible for the wave. “My back hand will just touch the rail on the upward swing,” says Occhilupo. “Focus on the section of the lip you want to hit, and on pushing with your back leg.”
The Details
Just like the frontside bottom turn, paying attention to the details is the most important thing. “An immediate transfer of weight is the secret,” says Occy. “With the right track, the correct punch off the bottom and the right angle of rail, you should be generating the speed and positioning you need for your next move. From here you’re off and running.”
This post was taken from Surfing The Manual: Advanced by Jim Kempton.
How to handle rocks
November 21st, 2011
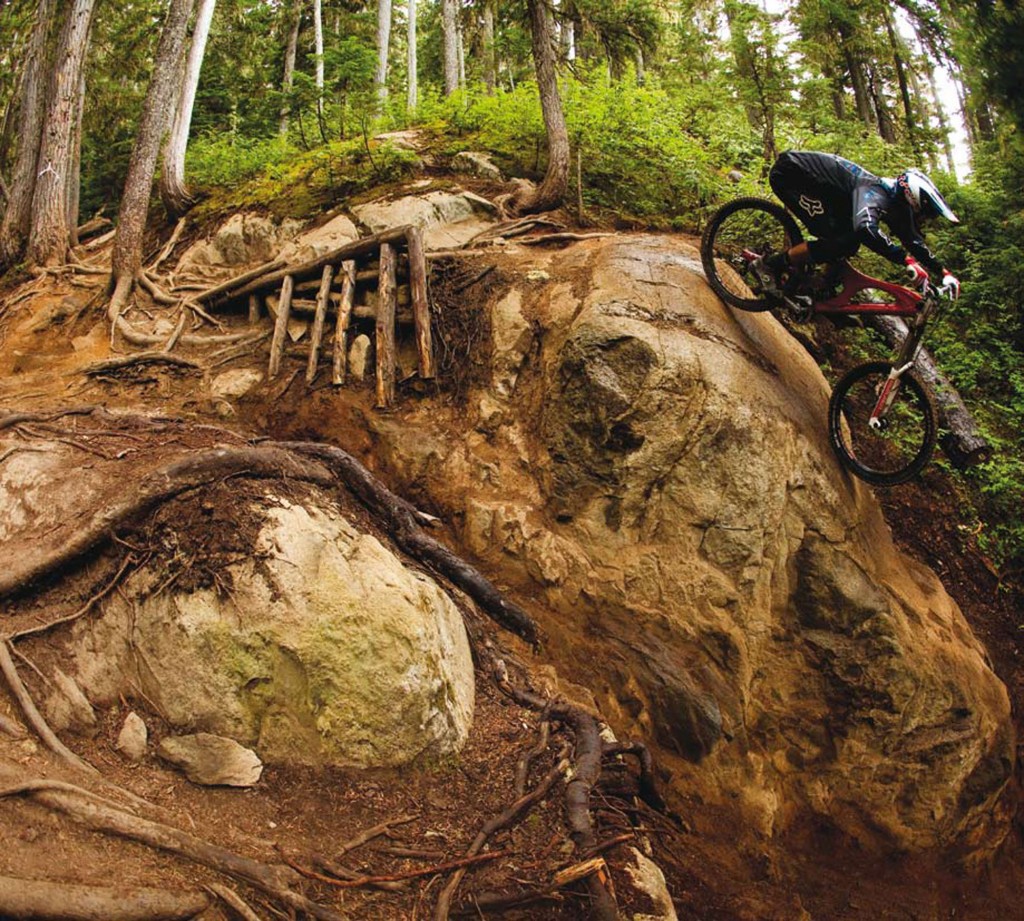
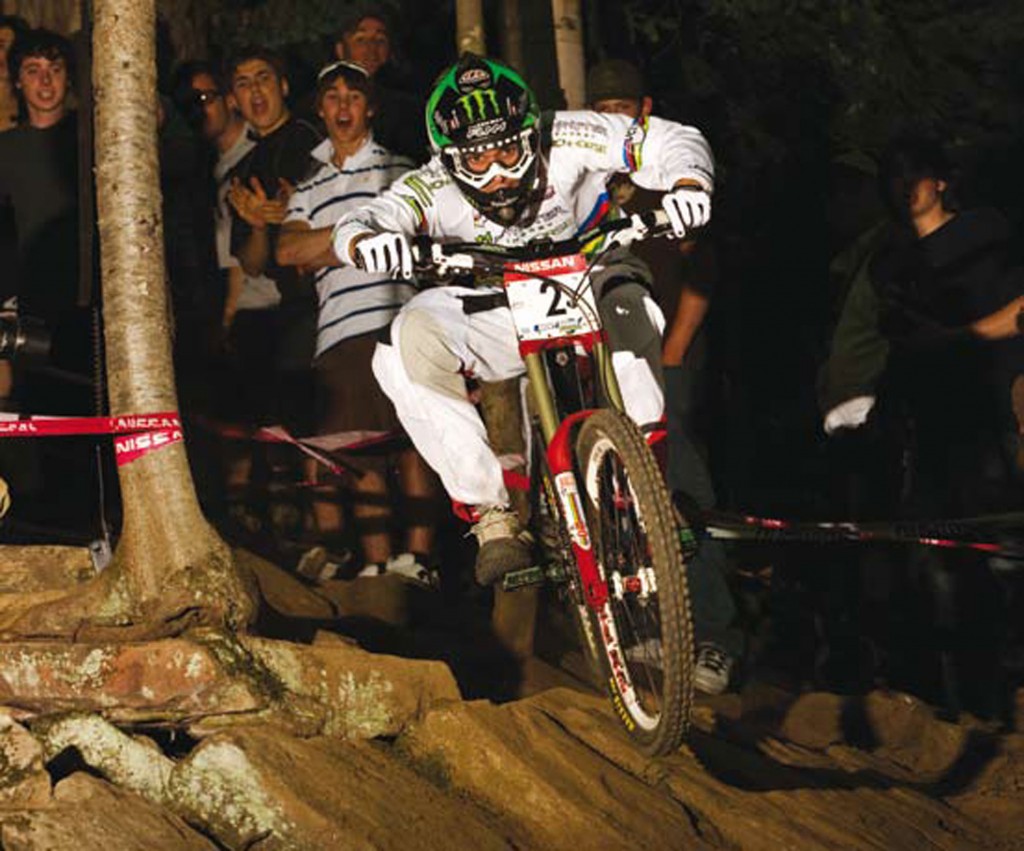
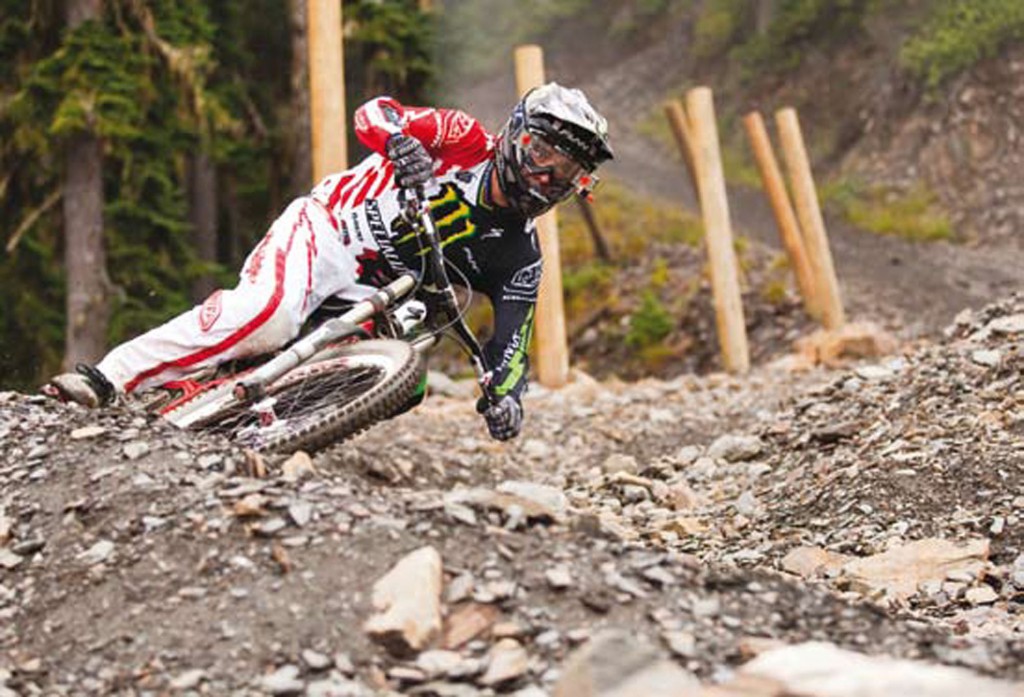
Whether it’s the barren, wind blasted moraines of the high Alps, the huge glacial formations of Canada or the boulder strewn trails at British trail centres, handling rock sections well is essential for success. From sliding down loose scree slopes with fist sized rocks moving underneath your tyres to traversing off camber granite rocks the size of a house, a certain mentality is required.
It takes confidence and calm determination to conquer the section rather than becoming its victim. The rocks will always win in a contest of hardness, so absorption is the way to go. Keep yourself focused on the end goal and let your ego have a small knock once in a while. Better that your mind takes the hits than your head.
The 2002 UCI Downhill World Cup in Fort William was a moment in time where sheer rider strength and brutality conquered all that lay before them. Chris Kovarik won by 14.02 seconds, one of the biggest margins in modern pro men’s finals history, yet it wasn’t just the gap he won by that was impressive. To go that fast, Kovarik had to take on a course that had been torn apart by the wind and rain all week. He came across mud covered hard Scottish rock on almost every section of the track yet pushed on, took each hit and destroyed the field.
STRENGTH
As one of the more powerful riders, Kovarik puts his strength at the top of the list. “I can make the bike stay on line by holding on and keeping it straight through the rocks”. By staying solid and not getting knocked off his line, Chris can keep it between the tapes and take hit after hit. Although gruelling, it’s this ability to take the rocks on at their own game that gives him the edge he needs to win.
Not only do you need to make your upper body strong enough to keep the bike on track, you also need the endurance to take the endless hits that a rocky run will throw at you. In Kovarik’s opinion, “You need to make your muscles more efficient to hold on well. Get down the gym and develop your core. You don’t just need bulk, you need the efficiency and stability that comes with it”.
BRAKES
How you brake will depend on what the surface is like. If it’s wet and the rocks are slippy, you need to go steady and approach the braking just like you would on a rooty section. As grip only comes when your braking is either light or completely non-existent, go easy on the anchors. No panic braking, and be prepared for a bit of movement under the wheels.
If the slope is steep and rocks are loose you’ll need more bias on the back brake to stop the front end from pushing off the trail. A bit of a rear wheel skid here or there is no problem, in fact sometimes it can really help to control the bike and keep everything on the straight and narrow. Plan your braking for what lies ahead. If you’re cresting at mach 9 into a rock garden you should be thinking of taking some speed off early. Once you hit the rocks, forward momentum and letting the wheels roll will be a huge help.
SET-UP
For a rocky ride, do a few things to set yourself up properly. To prepare for his ride at Fort William Chris Kovarik had this to say. “Suspension set up is super importan. If your bike is set-up too soft you will be falling into all the holes and hanging up on every rock. If it’s too hard you will be bouncing off line and getting beaten up.
You don’t want to be pinch flatting every run in those rocks so pay attention to tyre pressure and experiment with it. With your brake levers, try to adjust them as far in as possible without them crushing your fingers on the bars. Don’t have your braking finger struggling way off by itself. Grip it closer to the bars with the others like a fist. This should give you way better strength to hold on with”.
This post was taken from: Mountain Biking The Manual by Chris Ball
Spot of the week: Sunset Beach, Hawaii
November 17th, 2011
Next week the Van’s World Cup of Surfing will be taking place at Sunset Beach, Oahu, Hawaii.
Before the event we take a look at one of the longest beaches in Oahu.
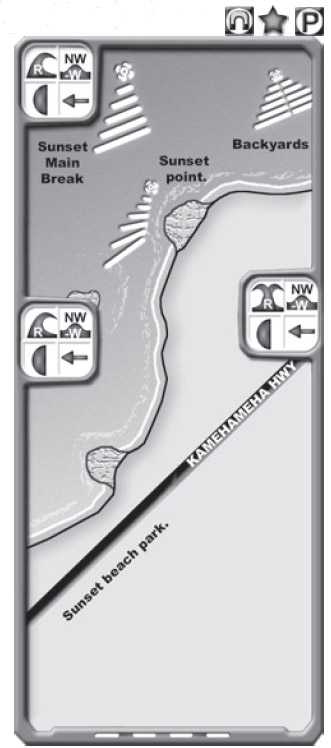
Up the Kam Hwy till you see the parking spaces on the left after Kammies. Sunset; Set of reefs dealing with
swells from N through W. Northerly swells break the wave up into different peaks, and make the place a little more
sharing as a result.
On a classic big West swell with trades, Sunset is a heavy, jacking peak that develops into a hollow, sucky, thick lipped beast.
These swells catch the trades side-offshore, and the result means heavy long boards and serious intent are required to get you
into the wave. 4-15ft. Major Rips. Crowds. Expert.
Sunset Point, further inside, is a quality R breaking at 3-6ft on NW – W swells. It can lose shape on N swells. Crowds. Intermediate.
Just East is Backyards; fickle, often shifty proposition that goes left and right, and works from 4 to 1212 ft. Currents and unpredictable
peaks absorb surfers well. Expert or tow-in.
Finally, Outside Sunset: Huge right tow-in spot when Sunset is closed out. Can work all the way through Outside Backyards, which is a
right / left outer monster too, with shallow reef under the end section. Hell-men only!
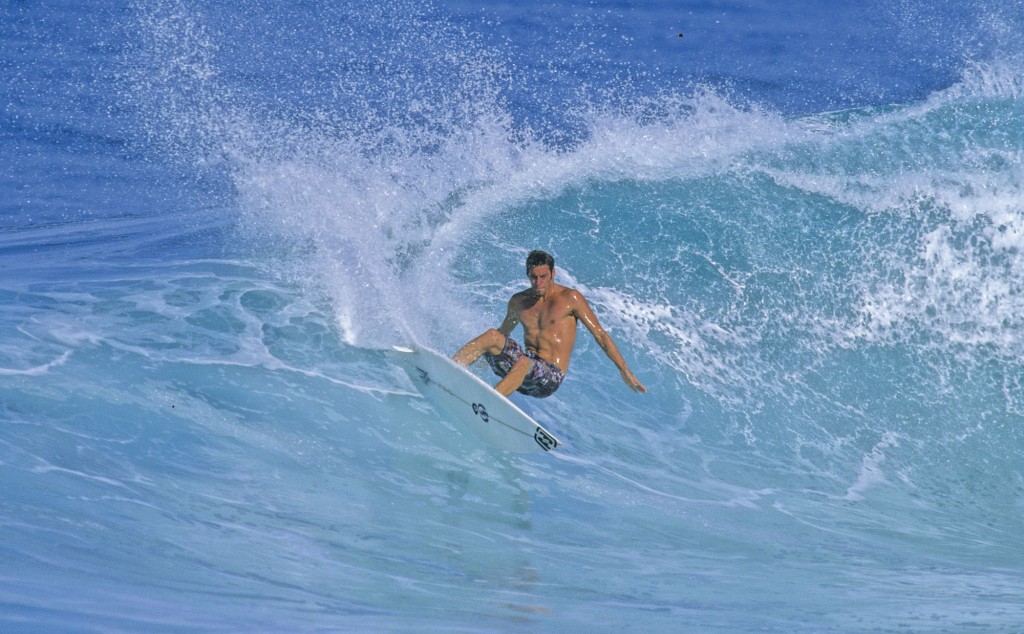
Frontside signature the cutback: putting your own stamp on a timeless maneuver.
November 11th, 2011
A fraction of a second captured by Tom Servais on the North Shore during the winter of 1992 set a new standard for commitment in the area of radical rail transitions, which had not been exceeded since the Michael Peterson era of the mid-’70s. For the thousands who held Tom Curren in the highest regard, that moment provided explicit evidence of his grace, style and power in the water.
The iconic image of Curren’s grab-rail front at Backdoor helped to shape the approach of an entire generation, and still stands as possibly one of the single greatest frames ever photographed in our sport. While one of the most essential maneuvers in a surfer’s repertoire, the frontside cutback is not only functional, but also provides a rare opportunity to add your own signature.
From Curren’s fundamentally flawless carve, to Joel Parkinson’s sweeping lines, to Andy Irons’ aggressive power turns, from Donavon’s come-from-behind arcs, to Rasta’s soulier-than-thou body English, all turns serve essentially the same purpose, all the pageantry is just a matter of aesthetic appeal. The difference between a cutback and other reversals of direction (like snaps and laybacks) is that the maneuver is done at continuous fluid speed.
The cutback allows you to use the rail of your board, and brings you back to the source of the wave where you can generate more speed for your next hit. Like a fingerprint, no two surfers’ cutbacks are the same, but there are some universal things that make for a great frontside carve.
DALE VELZY
One of surfing greatest innovative shapers and entrepreneurs, explaining the evolution of early modern surfboard design, referring to Bob Simmons who first used light balsa and foam for surfboards.
Simmons knew how to make ’em light. But I knew how to make ’em turn.
Six fundamentals of A good cutback
1. TIMING IS EVERYTHING
Don’t make your turn too early when the wave is too vertical, but conversely, don’t glide too far out on the face where the wave is too flat. Keep your eyes focused on the part of the wave you want to hit. It is best to hit the section where the lip is just beginning to break at the edge of the whitewater.
2. GO TOE-TO-HEEL
Start bending your knees when you come up the middle of the wave face, and shift your weight from your toeside rail to your heelside rail to initiate the cutback. As you lift out of your bottom turn, keep your board flat on the wave face to retain full speed, then un-weight your front foot and lean slightly back.
3. THINK RAIL-TO-RAIL
As your feet and weight shift from toe to heel, the outside rail rolls over and begins to engage the wave. The more speed, the easier the transition from inside rail to outside rail. But as you transition, your mind needs to make the change too.
4. KEEP YOUR MOMENTUM
Be sure to watch your board’s nose as you reverse direction, because you want it to fit into the wave shape to maximize speed. As your board turns back towards the breaking wave, keep the fluid momentum going. Don’t let up midway through the turn, which is tempting to do when you want to keep going down the line. This lack of follow through will make you lose speed, the all-important aspect to making your next move. Bend your knees and keep driving through what is now a backside bottom turn.
5. FINISH STRONG
Your board should finish with the nose pointing straight back towards the breaking wave, ready for another drop with maximum speed. Just as in your initial take-off, look down the line when you have finished the turn, read the wave to determine angle and steepness of the drop-in. The big advantage you have at this stage, is that you are already on your feet and having maintained speed through both your first moves, are much more ready to position yourself to go straight into your next bottom turn.
6. NEXT MOVE OPTIONS
At this point there are several approaches to the next move, and they will depend on the shape, size and power of the wave.
6.1. AIM HIGH FOR THE LIP – Aim high for the lip and essentially turn your cutback into a re-entry. Occy says this gives you the best opportunity to get down the line if the wave is hollow and powerful. It also forces you to come down with the lip.
6.2. AIM FOR THE MID SECTION – Aim for the mid-section with a classic roundhouse cutback and catch the oncoming whitewater with power. Joel Parkinson says what he loves about this line of attack is holding your turn as long as possible for maximum carve factor. It generates the most momentum, he says, but requires taking the brunt of the wave’s power and can sometimes be risky in big surf.
6.3. AIM LOW – Aim low and attempt to avoid the wave’s power and avoid being knocked down by the swirling foam. This may be the safest route in bigger surf, but it does offer the best chance of losing the face of the wave and being left in the whitewater. The best way to avoid this is to take the steepest route down the face and to do a sweeping bottom turn off the flats, initiated by a drop just like the one you did on the take-off. Now you are putting moves together.
This post was taken from Surfing The Manual: Advanced by Jim Kempton.
Berms- berms are everywhere
November 9th, 2011
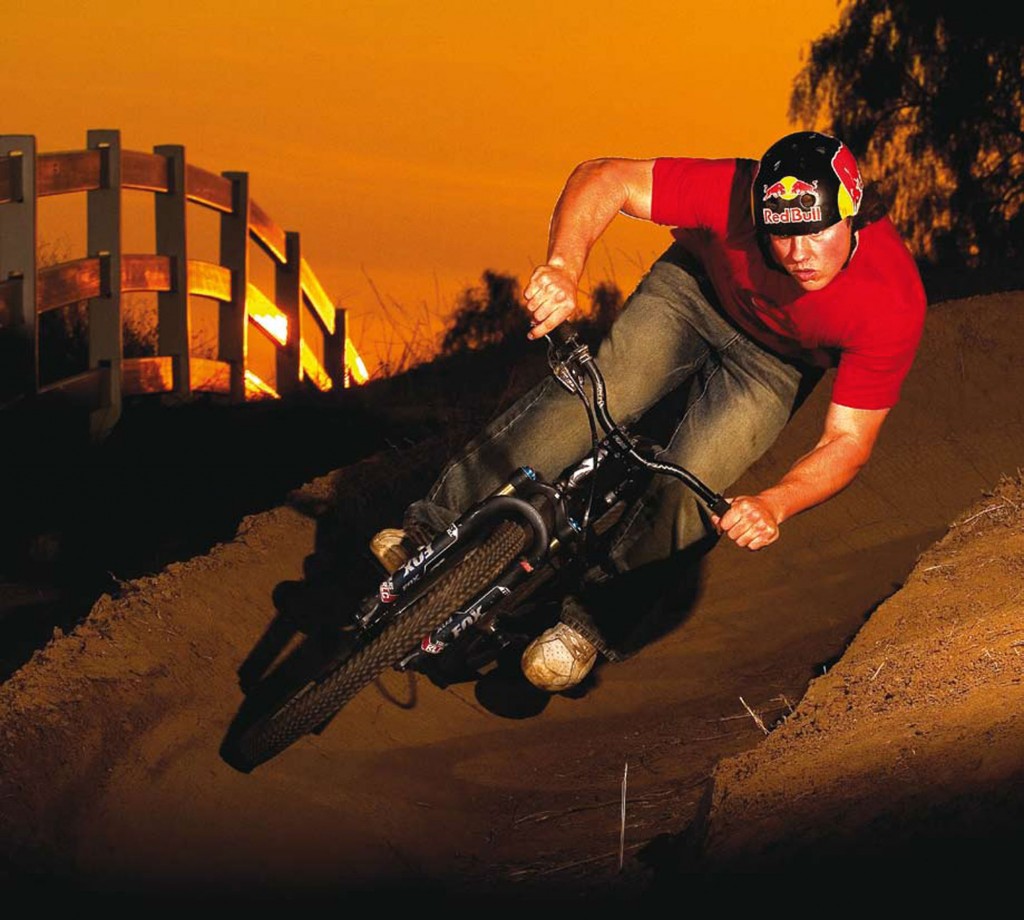
From the manicured perfection of the Beijing Olympic BMX track to the upper slopes of the Fort William UCI World Cup course, the abundance of berms now means that nailing them is an essential skill.
Think of a berm as an old friend. Rarely do they cause you grief; in fact their very presence should mellow you out. Hit them right, and they can add a whole new dimension of flow to your riding.
A well-sculpted berm will allow you to change direction effortlessly and give you a bit of speed too. The flip side is that if you’re unsure of how to ride the
steep sided bank, a berm can look pretty intimidating, as it rears out of the trail ahead.
GO WITH THE FLOW
The best thing to do with a long shallow berm is to let it do the work for you. If the shape is right, the line should feel natural as the gradient holds you in place the full way around the turn. If the berm is big and open enough for you to be able to choose where to go, try and follow the idea that the steeper it is the faster you can go. So, as berms tend to steepen as they rise, a slow pace may mean that you stick to the bottom whereas, flat out, you should be looking to stick to the steeper lip near the top. Even as you hit tighter and steeper berms, you should feel like the dirt is doing all the work.
Aim to make the corner as smooth as possible. If the berm tightens towards the end, adjust your line with it. Likewise if the corner opens up, you should be easing your line out to reflect that. The more consistent your line, the more stability you’ll get and it’ll be easier to start introducing more speed.
BRAKELESS
Brakes and berms don’t really go together. In fact, the very presence of a berm should relax you and make you feel like you can keep your speed rather than having to slow down. To help with your confidence think of a berm as something positive rather than another trail obstruction. This mindset should stand you in good stead to railing the turn with prowess and skill.
The first thing that’ll happen if you pull on the brakes mid-berm is a sudden change of line. As you’re trying to get your tyres perpendicular with the dirt, any braking force will start to pull you upright making the corner a struggle to get around. Like a flat corner, if you do need to scrub some speed, do it on the way in, while everything is still upright and there’s plenty of grip available.
When you get into the berm, look for the exit. There’s not much else you need to be thinking about. The further you can look around the berm, the more you will carry your speed. Once you are comfortable with the idea that the berm is your friend it will all become easier and you’ll be able to relax and think of what to do next. Thinking a few steps ahead of yourself is the way to ride if you want to get really fast.
FRONT LOADER
With the bank there to support you, it’s possible to put more weight on the front wheel than you could on less stable terrain. As you come into the berm, start putting more force through your arms, as if you’re trying to push the front tyre into the dirt. The steeper the bank you’re pushing against, the more weight you should be able to trust the front tyre with. It should all happen nice and slowly. Remember that flow we spoke about. Riding your bike is a combination of lots of different moves happening together so always let the trail, the grip and your feeling dictate how much you’re going to move. Load the front gently and progressively rather than all at once. It’s only once you start riding like this will you truly be able to notice the difference between suspension settings and contrasting tyre treads.
ATTACK, ATTACK, ATTACK
As you get more confident with hitting berms without hitting the brakes, you can start pumping them for speed. It’s incredible how much speed you can get from a berm and just how aggressively you can hit them. Ever seen the images of riders doing a power-wheelie out of a tight berm after hitting them so hard the end of their bar is almost scraping the dirt? Impressive. To begin with, shift your weight forward just like you normally would. However, this time you’re trying to coil a spring and generate inertia that can be unleashed on the exit.
To do this push into the berm harder than before and as you reach the mid-point or where the berm starts to leave you, push the bike away, like
you’re trying to do a strange manual whilst in the turn. If you get the timing right, this quick shift in weight will give you a burst of acceleration that you
will have never had before. It’s one of these things that you’ll know when you get it right.
This post was taken from: Mountain Biking The Manual by Chris Ball
Spot of the week: Alii Beach, Hawaii
November 6th, 2011
Next week the opening event of the prestigious Vans Triple Crown of Surfing series – the Reef Hawaiian Pro – is taking place at Alii Beach, Haleiwa, Oahu, Hawaii from November 12th – 23rd 2011.
Ahead of this event we take a look at the beach where Baywatch Hawaii was filmed.
Head North up the Kam Hwy to Haleiwa. Left turn into town towards the harbor. When it’s on, it is one of the heaviest,
fastest, hollowest rights imaginable. The main peak is about 300m out to sea, and the wave forms heavy sections all the way
across to a shallow close-out spot (Toilet Bowl).
Best at 6-8 ft with prevailing Northeast trades, and Northwest to West Swell. When bigger, can get very rippy and bumpy, but quality is possible up to 10 -20ft plus. Watch locals paddle-out to gauge current and best route. Flirt into the zone to get your wave, then hang wide between sets. Beginners can check the inside shore break. Crowds; Crazy in winter. Experts only unless small.
Avalanche is a big wave arena several hundred yards further out. Lefts up to 30ft plus are not uncommon in winter. Tow-in spot except Dec-May (Whale season) Unreliable end section means that floggings are common even if you make the initial drop. Moving peak means constant paddling to re-position, and outside bombs are a constant risk. (An Avalanche of water on your head). Experts only.
Hitting bottom – the bottom turn is the bottom line
November 3rd, 2011
When Phil Edwards, the greatest master from the early ‘60s, first began using the rail in a radical way, it created a sensation in the established surfing society of the time. Among the very early stylists to lay it over on the rail, Edwards was quickly emulated by every young surfer worth his saltwater.
But it was Barry Kanaiaupuni at Sunset that set the standard for bottom turns in the early ‘70s with his impossibly late drops with the lip coming over. Freefalling down the face to the bottom, when everyone else was screaming ‘turn!, turn!,’ Barry would hang for a moment, and then fade.
A second later with all the g-force loaded up on edge, he would bury the rail to the stringer, front arm and nose projecting like double tips of a spear, and slingshot out into the big open face. For a generation of young surfers it was a marvel to behold. It would be nearly a decade before a future three-time world champion named Tommy Curren would again raise the bar on bottom turns.
Unless you’ve succumbed to the allure of late drops and free falls into ridiculously round pits, everything from fading, carving, top-turning and stalling is centered around your ability to take it off the bottom. While not given due credit, it could be the singular most important maneuver in your arsenal. Need proof? Watch a few waves of Andy Irons at Pipe, or Kelly Slater at J-Bay, or Joel Parkinson and Mick Fanning at Snapper, or Tom Curren anywhere.
The bottom turn is where it all begins, Curren once said, it’s the foundation for the rest of your repertoire. Plain and simple, if you’re not pushing hard off of the bottom, ripping full-on, rail-grab speed turns off the top isn’t even in the realm of possibility. Be it projecting into an oncoming tube section, driving down the line or ensuring you stay as close to the pocket as possible, it all begins at the bottom.
Turn and burn - how to make every good turn deserve another
1. SPEED
Step one is to drop down the wave face with all the speed you can. While important for any maneuver, speed is essential in a bottom turn. To get maximum velocity, take off as steep and late as possible while still being able to make the first section (Not only does this give you maximum speed, it also ensures your wave priority, guaranteeing a best-case scenario for the ride).
2. TIMING
Bottom turn timing sets up the rhythm of the whole rest of the ride. The simple secret is to hit the turn at the moment of maximum speed, says Shane Dorian: It’s easy to say, but takes a thousand practice runs to perfect. And on the subject of practicing, any wave offers you an opportunity to rehearse a bottom turn. If it’s a closeout, try timing when the wave shuts down and use the speed to feel the move. Lifelong surfer and lifeguard Rich Chew says he used to go out after school and do a hundred bottom turns just to get the one move down. And he became the Men’s U.S. Champion a year later.
3. SPRING
Often it is advantageous to stay in the squat position you are in as you leap to your feet on the take-off. Remaining in a crouch on the drop reduces wind resistance, helps keep your balance and provides a critical element to the bottom turn: the spring/drive/thrust of your lower body. Any shot of Tommy Curren, Kelly Slater or Mick Fanning will most likely show a low center of gravity, legs bent tightly, like a well-coiled spring. The speed, power and control these surfers get out of their initial turn provide the basis for everything that comes after.
4. FOOT PLACEMENT
Finding the right spot on your board takes some experimenting as you go, but once you find the ‘sweet spot,’ your confidence will soar. Keep your feet centered over your stringer. You can use it as a line almost like actors use marks on the floor to position themselves for their parts. If your toes are hanging off the rail, you’ll be alright on the frontside rail turn, but as you reverse to the heelside rail you’ll be totally off balance. If you get your weight too far forward, your nose will tend to catch; plus the chest area of the board tends to be the thickest spot, and the most likely to bog down. If you have trouble with finding the right spot for your back foot, a pad placed perfectly in the right spot can give you the instant touch you may need.
5. WEIGHTING AND UN-WEIGHTING
Without powerful commitment on a bottom turn, there’s not much chance things are going to improve from there. Remember: for every action there is an equal and opposite reaction. This means the harder you push, the more projection you’ll get from the turn. But keep in mind if your weight is too far forward, you’ll most likely dig a rail. From the start of the maneuver, hold your back-foot pressure throughout your turn, and then transfer your weight a little more to the front foot toward the end of the turn. You may even feel your board want to slide. This usually means you’ve transferred too much front-foot pressure. Keep your weight too far back, or completely over your fins and you’re likely to spin out. Find the balance point by evenly distributing your weight.
6. PUMP AND DROP
If the wave is walled up on the first section, throw down a few pumps before you drop down the face to turn, so that you get across the walled face and don’t get caught behind the section. Be careful not to lean too hard because you will bury your front rail under water, catch an edge, lose your speed, and faceplant. A fast down-the-line turn like this means putting hard pressure on your rail and then quickly releasing so that the board’s forward momentum continues without deep rail resistance. Think distance, not power.
7. BODY MECHANICS
One of the most important mechanics to remember is the torso rotation on the frontside bottom turn, says Brad Gerlach. Your leading arm and chest needs to pivot parallel to the board. The solar plexus needs to face towards the stringer of your board just before making the turn.
This post was taken from Surfing The Manual: Advanced by Jim Kempton.
