Posts Tagged ‘surfing skills’
Before you take off – the frontside punt
December 14th, 2011
THE FRONTSIDE PUNT
The Approach
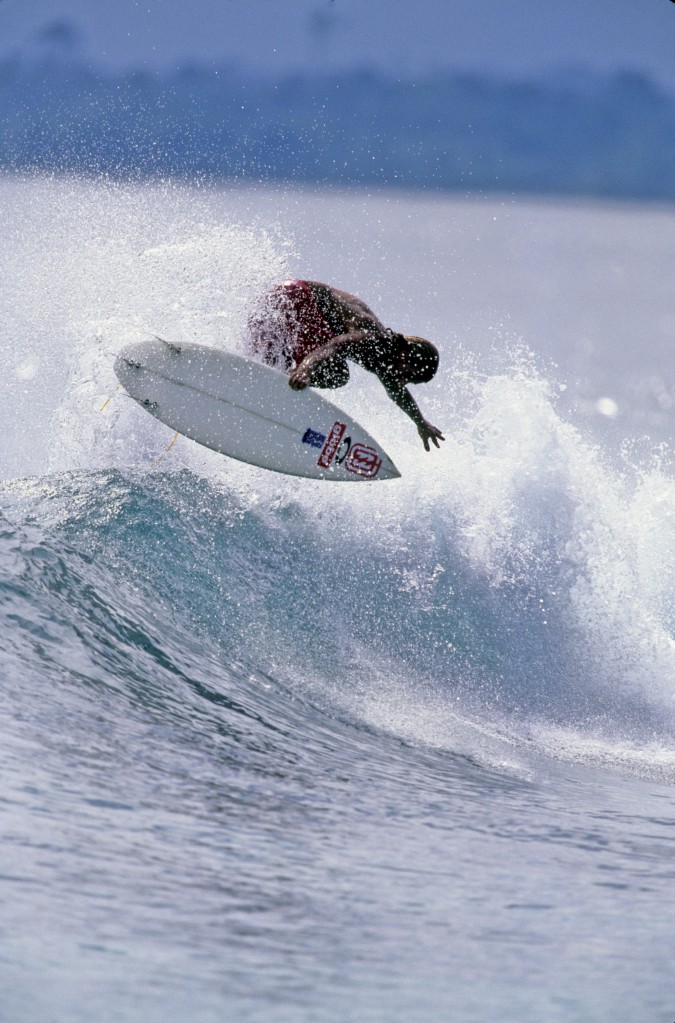
Spying a perfect little launch section, approach with heaps of speed, and as you begin to move up the ramp shift most of your weight to your back foot, using your front foot to simply guide you up to the top of the wave. Maintain eye contact on the section you’re hoping to boost from. Drive through your bottom turn into a clean launch off the top and carry your momentum off the lip into the air. Your board needs to lay flat on the lip when you take off. The key here is to get up high. “To do that you need to drive your momentum off the top of the wave by pushing off the tail of your board,” explains Taj Burrow.
The Moment
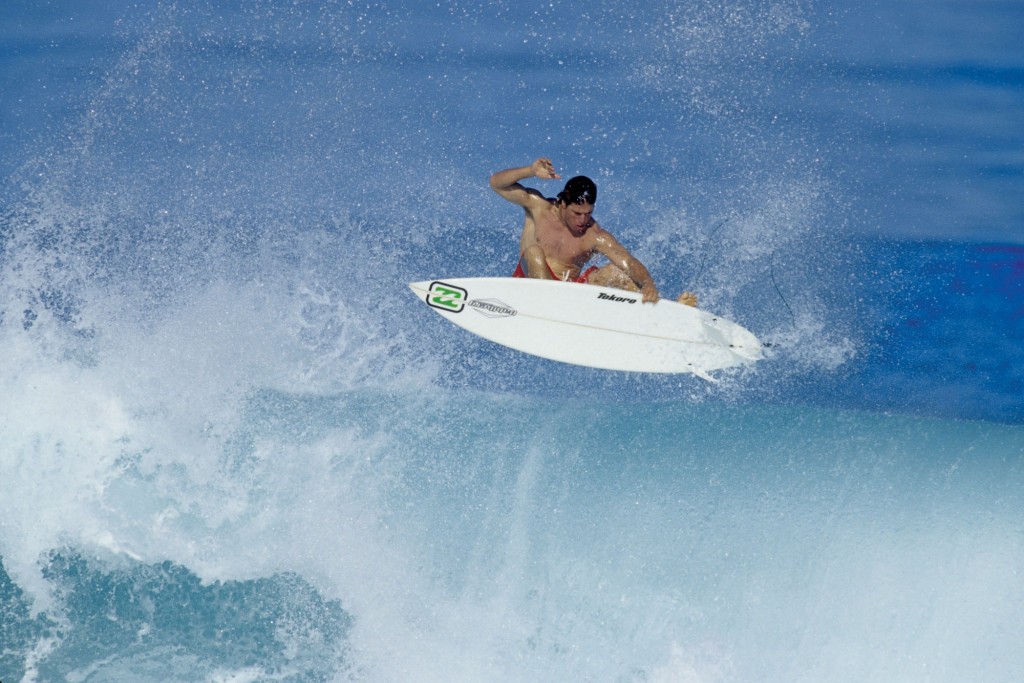
Once you hit the section try to completely un-weight your board by springing above the lip. Continue to keep the weight off your board during the altitude climb, and at this point think about contracting your upper body towards your lower body – this will make you more compact and centered as you fly through the air. “As you get airborne, try and turn the nose of your board towards the beach by straightening out your back leg. Just stay above your board, and pull your knees up to your chest to stay in control and to stay stylish in the air. The wind coming towards you can really make a difference here,” continues Taj. “You’ve got to stay over the top of your board, and not lean back too far.” Consider applying a little pressure with your back foot to ensure that your flight path is spot on. If you feel like your board is going to get away from you, this is the time to grab the rail. There are all kinds of different variations you can do – double grabs, mute grabs and frontside grabs; almost anything you want. I don’t really plan it all out most the time. I just experiment and learn by feel.” As you reach the apex of the air you’re going to need to spot a landing zone. Staying focused on where you’re coming down is the key to sticking it.
The Recovery
The toughest part of flying is undoubtedly the landing, so make sure you’ve got yourself together as you start coming down. Be it a busted knee or a tweaked ankle, it’s really easy to get hurt landing airs, so don’t be afraid to bail out if you don’t feel right. If you do feel good, start coming down with weight evenly distributed and maybe just a bit more pressure on your back foot. “As I start to come back down I let go of my grab and check out the softest landing area, which is usually the whitewater,” tells Taj. “I try to extend my legs a little so my knees can absorb the impact.” Avoid the temptation to ‘stomp’ the move down because straight-legging it at this stage is a recipe for disaster. Negotiate the whitewash by quickly squaring up your shoulders over your board, and with knees bent and tucked firmly under your torso. From there it’s just a matter of not falling off.
Add Some Style
Parko adds: “Style is a lot more important today. It used to be guys would just throw it up into the air and let it fall where they may. But guys like Taj have made style an issue by doing it so well. There are two ways to add style, says Parko. First, use your knees as shock absorbers, and stay low to keep your center gravity and balance. And second, finish strong with more speed: connect as smoothly as possible, complete the wave, and continue to ride.”
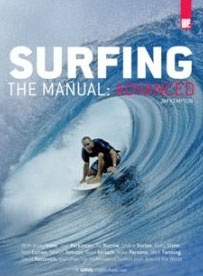
This post was taken from Surfing The Manual: Advanced by Jim Kempton.

A barrel of fun – frontside tube riding distilled
December 9th, 2011
Peter Townend, the 1976 World Champ, likes to tell the story of Gerry Lopez giving him the secret of riding the tube: “I was a grommet at Coolangatta, surfing Kirra, and I could get into the barrel, but I couldn’t get out,” relates PT. “So Lopez showed up on the Gold Coast with Jeff Hakman and Jack McCoy.
Being the brazen little grom that I was, I walked straight up to him and introduced myself. I told him I’d been surfing Kirra and he was interested in going to try the tubes there. So I straight-up told him that I was having trouble getting out of the tube. ‘Let me tell you a little secret’, Lopez confided. ‘You see that big water pipe over there? The next time you’re in the tube and you are having trouble, take your front hand and point it directly in the center of the cylinder.’ I went back to Kirra that very next day, and every time I put my hand in the eye of the cylinder I started making it out of the tube!
It’ a simple tip, but I never forgot it.” The history of tube riding is a storied affair primarily built around the training ground of Banzai Pipeline, where nearly all surfing’s early barrel techniques were developed beginning with Butch Van Artdalen’s initial encounters in 1962, earning him the first title of Mr. Pipeline.
Jock Sutherland was next in a succession of regal pipe masters that was most epitomized in the early 70s by the zen-like grace of stylist Gerry Lopez. The torch was passed to Shaun Tomson in the winter of 1976, when new equipment and new vision allowed Tomson to actually begin maneuvering inside the tube at Backdoor.
The Pipeline Masters contest created a forum for performance that has crowned a number of heirs to the throne, including multi-time winners, Rory Russell, Larry Blair, Derek Ho, Tom Carroll, Kelly Slater and Andy Irons. For aspiring experts there’s no other place so sought after, and dreamed about than the tube. To ride in the barrel requires commitment, skill, and the ability to read the waves in instant detail. The punishment for errors is severe; the prize is communion with the very essence of the sport of surfing. It is estimated that only one in twenty surfers can confidently negotiate the tube. Here are some takes by the world’s best, to give an edge to the upcoming 5%.
1. SPEED
Surviving the barrel is all about speed; how to get it, and how to control it. To get deep in a barrel, you need to decelerate, but to get out, you need as much speed as you can get. Learning how to decelerate and accelerate will give you control of your tube ride and therefore allow you to get as deep as you can, and still get out.
2. SHOULDER IN
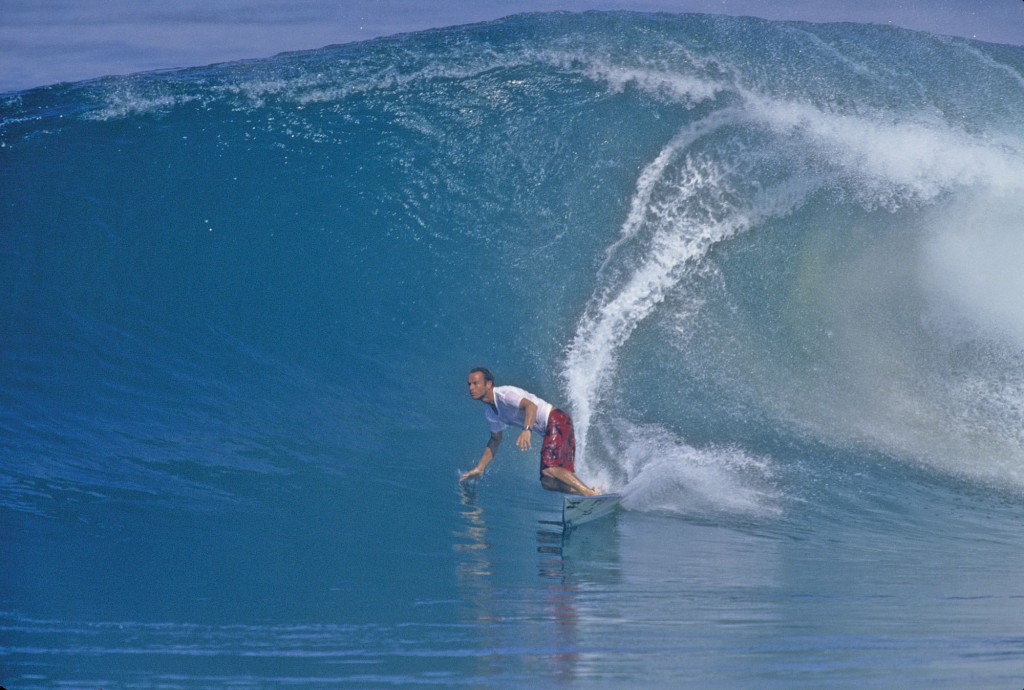
“The best trick I can remind tube riders to remember is to keep your lead shoulder in. It completely changes the body positioning. At this point you can make adjustments in the tube. The key is to make the negotiation between not getting too high (so that you get sucked up the face and over) and not getting too low (so that you lose your speed or get caught by the falling lip.) Both Mick Fanning and Joel Parkinson have developed a new approach which puts their weight on the front foot almost exclusively. Their back foot is turned over – the heel is rarely touching the deck. They put all their weight on the front foot and with today’s boards, the speed is built around weighting and unweighting.” Shaun Tomson, World Champion.
3. SETTING UP
Another important aspect is setting up the turn to position for the tube: Sometimes a hollow section will be coming a ways down the line and you will want to make a couple of quick pumps to position yourself right where you want to be as the lip pitches. If the tube comes up quickly, sometimes it is necessary to make a quick hook turn on the face, get your rail in, and duck quickly under the lip.
STEP BY STEP
1. TAKE-OFF
Barreling waves are steep waves. Barreling waves are fast waves. Therefore, paddle fast, and at an angle. You must take off right on the peak, dropping down the face. Depending on how fast the wave is, you need to decide where to bottom turn. On fast waves like Pipe, you’ll drop to the bottom with no chance of engaging a fin. You must get the fin in as soon as possible.
2. BOTTOM TURN
This step is crucial. Too late and you’ll lose speed or find yourself outside the curtain. Too soon and you out-run the lip and have to stall to get back in. When you start your bottom turn, keep the knees bent like a coiled spring, and point your head in the direction you want to go next (back up the face). In small waves, now is the moment to make yourself small, to avoid decapitation.
3. PULLING IN
This is the moment of truth, when you must get yourself into the right part of the wave. You need to be half way between the top and the bottom of the wave. Too high and you get your neck chopped by the lip. Too low and you will be drilled. Use your back foot toes to engage the fin for more height. Release the toes and weight the front foot to drop back down the face. The key success factor for this: keep the high line as long as possible; height = speed, and speed = a safe exit.
4. SPEED
Surviving the barrel is all about speed; how to get it, and how to control it. To get deep in a barrel, you need to decelerate, but to get out, you need as much speed as you can get! Learning how to decelerate and accelerate will give you control of your tube ride and therefore allow you to get as deep as you can, and still get out the end.
5. DECELERATION
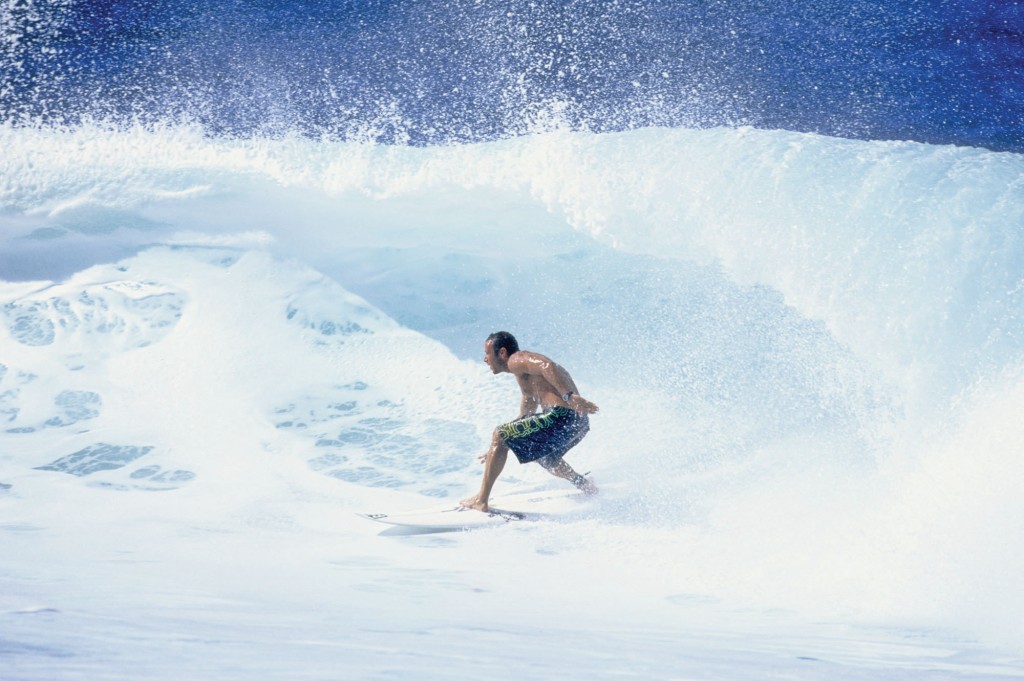
To get deeper, decelerate. Hand-dragging is the most effective way to lose speed when there is little room for maneuver. Stick your back hand into the wave… Not too sharply or you are gone! Weight shifting is the cleanest but slowest way to lose speed. Rock back onto your back foot. This brings the nose up and de planes the board, creating drag. Some small s-turns or wiggling; will slow your progress and allow the lip to catch up. This is hard to do in small tubes where you are crouched over the board.
6.THE RIDE
Staying with the lip is all about control. Accelerate and decelerate to keep you in the slot, using the techniques in step 5. Hold your line no matter what.
7. EXIT STRATEGY
You need to use all that speed you banked earlier and enough height to allow a sharp acceleration. Here are some tips on how to get the speed you need to exit:
Put weight on the front foot to reduce drag.
Rock back and forth while applying, and releasing, back-toe pressure. This engages then releases the fins and literally “squeezes” speed out of the board.
Keep low and tight; loose arms and heads create drag, and add to the risk of lip chop.
If you look at the exit, you will go through the exit! If you look at the roof, you will go through the roof. If you look at the board, you will drop too low.
This post was taken from Surfing The Manual: Advanced by Jim Kempton.
Backhand across the face – A successful backside attack begins with your bottom turn
November 25th, 2011
Your ability on your backhand begins and ends with the proficiency of your bottom turn. And while, in terms of projection and speed, the basic physics behind a backside bottom turn are relatively similar to a frontside bottom turn, it’s the mechanics that are completely different. Frontside bottom turns are considerably less technical for the simple fact that when you commit to the turn, you’re facing the wave.
There’s much more of an unknown factor when you’re setting things up on your backhand, and there’s no better place in the world to study this than Pipeline. Watch the best frontside surfers there, and you’ll notice that they practically fall into the pit, waiting for the ocean to throw over them before setting their rail.
There are very few long, drawn-out turns. But backside surfers don’t have this luxury; they have to rely on experience, instinct and one hell of a bottom turn. Either one of the Irons brothers serve as a perfect example. Bruce Irons stays low over his board, grabs his rail, sort of sideslips under the hook and about halfway down the face engages his inside rail and fins. This sets him up for the tube almost immediately, which allows him to sit far back on the foam ball from the beginning to end of his ride.
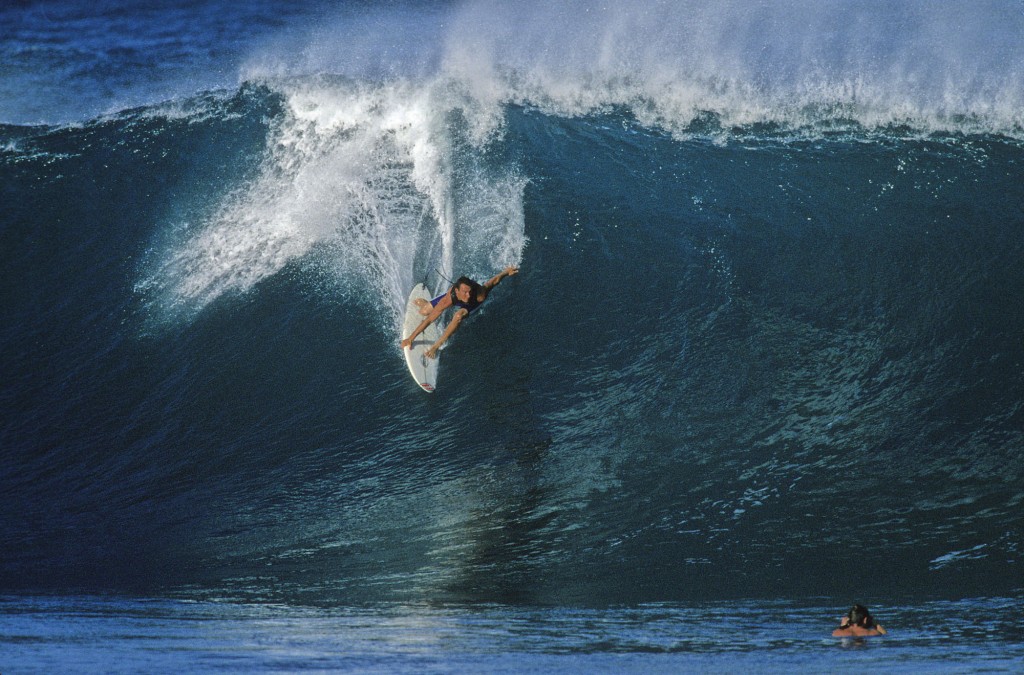
On the other hand, Andy Irons will often drop straight down the face, and as he starts to get to the bottom of the wave really leans into the turn, and depending on the situation, he either projects out of the turn and down the line, or picks a more straight-up path into the pocket.
Considering Bruce and Andy are both Pipe Masters, either approach is more than suitable. But before you go hucking yourself over the ledge at Pipe, you’d better understand the fundamentals first. Here are a few ideas to get you thinking:
The Approach
As with every other maneuver in surfing, a good backside bottom turn starts with your ability to successfully make the drop. Of course, there are exceptions. On particularly fast, racy waves, you’re going to want to angle across the face, so as to not get stuck behind the section. But if you’ve got some open room to roam, you should try and stay as straight and close to the power zone as possible.
The Turn
Start your bottom turn the instant you reach the flats and at the point of maximum speed on your drop. “Get low and lead off your front foot,” says Mark Occhilupo. To begin your bottom turn keep your knees bent, lean on your heelside edge, and turn your upper body in, looking over your front shoulder. This will initiate the turn and allow you to see the lip in front of you. It’s here that you’ll be able to decide whether you want to crush the lip or drive down the line. Your weight should be evenly distributed between your front and back feet. Ride through the beginning of the turn without dragging your heels in the water in order to maximize your speed. It is very important to keep your original line through the turn so you don’t lose any speed. Try to pick the right line from the beginning, maintaining one long, flowing arc. If you’re really pushing the turn it should be almost like you’re sitting in a chair, your butt just a few inches off the water’s surface.
The Next Step
When you begin to go back up the wave, transfer most of your weight to your back foot, and drive up the wave face to gain the maximum amount of speed possible for the wave. “My back hand will just touch the rail on the upward swing,” says Occhilupo. “Focus on the section of the lip you want to hit, and on pushing with your back leg.”
The Details
Just like the frontside bottom turn, paying attention to the details is the most important thing. “An immediate transfer of weight is the secret,” says Occy. “With the right track, the correct punch off the bottom and the right angle of rail, you should be generating the speed and positioning you need for your next move. From here you’re off and running.”
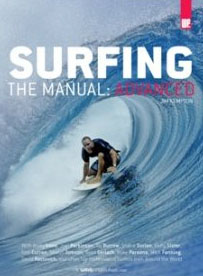
This post was taken from Surfing The Manual: Advanced by Jim Kempton.
Frontside signature the cutback: putting your own stamp on a timeless maneuver.
November 11th, 2011
A fraction of a second captured by Tom Servais on the North Shore during the winter of 1992 set a new standard for commitment in the area of radical rail transitions, which had not been exceeded since the Michael Peterson era of the mid-’70s. For the thousands who held Tom Curren in the highest regard, that moment provided explicit evidence of his grace, style and power in the water.
The iconic image of Curren’s grab-rail front at Backdoor helped to shape the approach of an entire generation, and still stands as possibly one of the single greatest frames ever photographed in our sport. While one of the most essential maneuvers in a surfer’s repertoire, the frontside cutback is not only functional, but also provides a rare opportunity to add your own signature.
From Curren’s fundamentally flawless carve, to Joel Parkinson’s sweeping lines, to Andy Irons’ aggressive power turns, from Donavon’s come-from-behind arcs, to Rasta’s soulier-than-thou body English, all turns serve essentially the same purpose, all the pageantry is just a matter of aesthetic appeal. The difference between a cutback and other reversals of direction (like snaps and laybacks) is that the maneuver is done at continuous fluid speed.
The cutback allows you to use the rail of your board, and brings you back to the source of the wave where you can generate more speed for your next hit. Like a fingerprint, no two surfers’ cutbacks are the same, but there are some universal things that make for a great frontside carve.
DALE VELZY
One of surfing greatest innovative shapers and entrepreneurs, explaining the evolution of early modern surfboard design, referring to Bob Simmons who first used light balsa and foam for surfboards.
Simmons knew how to make ’em light. But I knew how to make ’em turn.
Six fundamentals of A good cutback
1. TIMING IS EVERYTHING
Don’t make your turn too early when the wave is too vertical, but conversely, don’t glide too far out on the face where the wave is too flat. Keep your eyes focused on the part of the wave you want to hit. It is best to hit the section where the lip is just beginning to break at the edge of the whitewater.
2. GO TOE-TO-HEEL
Start bending your knees when you come up the middle of the wave face, and shift your weight from your toeside rail to your heelside rail to initiate the cutback. As you lift out of your bottom turn, keep your board flat on the wave face to retain full speed, then un-weight your front foot and lean slightly back.
3. THINK RAIL-TO-RAIL
As your feet and weight shift from toe to heel, the outside rail rolls over and begins to engage the wave. The more speed, the easier the transition from inside rail to outside rail. But as you transition, your mind needs to make the change too.
4. KEEP YOUR MOMENTUM
Be sure to watch your board’s nose as you reverse direction, because you want it to fit into the wave shape to maximize speed. As your board turns back towards the breaking wave, keep the fluid momentum going. Don’t let up midway through the turn, which is tempting to do when you want to keep going down the line. This lack of follow through will make you lose speed, the all-important aspect to making your next move. Bend your knees and keep driving through what is now a backside bottom turn.
5. FINISH STRONG
Your board should finish with the nose pointing straight back towards the breaking wave, ready for another drop with maximum speed. Just as in your initial take-off, look down the line when you have finished the turn, read the wave to determine angle and steepness of the drop-in. The big advantage you have at this stage, is that you are already on your feet and having maintained speed through both your first moves, are much more ready to position yourself to go straight into your next bottom turn.
6. NEXT MOVE OPTIONS
At this point there are several approaches to the next move, and they will depend on the shape, size and power of the wave.
6.1. AIM HIGH FOR THE LIP – Aim high for the lip and essentially turn your cutback into a re-entry. Occy says this gives you the best opportunity to get down the line if the wave is hollow and powerful. It also forces you to come down with the lip.
6.2. AIM FOR THE MID SECTION – Aim for the mid-section with a classic roundhouse cutback and catch the oncoming whitewater with power. Joel Parkinson says what he loves about this line of attack is holding your turn as long as possible for maximum carve factor. It generates the most momentum, he says, but requires taking the brunt of the wave’s power and can sometimes be risky in big surf.
6.3. AIM LOW – Aim low and attempt to avoid the wave’s power and avoid being knocked down by the swirling foam. This may be the safest route in bigger surf, but it does offer the best chance of losing the face of the wave and being left in the whitewater. The best way to avoid this is to take the steepest route down the face and to do a sweeping bottom turn off the flats, initiated by a drop just like the one you did on the take-off. Now you are putting moves together.
This post was taken from Surfing The Manual: Advanced by Jim Kempton.
Hitting bottom – the bottom turn is the bottom line
November 3rd, 2011
When Phil Edwards, the greatest master from the early ‘60s, first began using the rail in a radical way, it created a sensation in the established surfing society of the time. Among the very early stylists to lay it over on the rail, Edwards was quickly emulated by every young surfer worth his saltwater.
But it was Barry Kanaiaupuni at Sunset that set the standard for bottom turns in the early ‘70s with his impossibly late drops with the lip coming over. Freefalling down the face to the bottom, when everyone else was screaming ‘turn!, turn!,’ Barry would hang for a moment, and then fade.
A second later with all the g-force loaded up on edge, he would bury the rail to the stringer, front arm and nose projecting like double tips of a spear, and slingshot out into the big open face. For a generation of young surfers it was a marvel to behold. It would be nearly a decade before a future three-time world champion named Tommy Curren would again raise the bar on bottom turns.
Unless you’ve succumbed to the allure of late drops and free falls into ridiculously round pits, everything from fading, carving, top-turning and stalling is centered around your ability to take it off the bottom. While not given due credit, it could be the singular most important maneuver in your arsenal. Need proof? Watch a few waves of Andy Irons at Pipe, or Kelly Slater at J-Bay, or Joel Parkinson and Mick Fanning at Snapper, or Tom Curren anywhere.
The bottom turn is where it all begins, Curren once said, it’s the foundation for the rest of your repertoire. Plain and simple, if you’re not pushing hard off of the bottom, ripping full-on, rail-grab speed turns off the top isn’t even in the realm of possibility. Be it projecting into an oncoming tube section, driving down the line or ensuring you stay as close to the pocket as possible, it all begins at the bottom.
Turn and burn - how to make every good turn deserve another
1. SPEED
Step one is to drop down the wave face with all the speed you can. While important for any maneuver, speed is essential in a bottom turn. To get maximum velocity, take off as steep and late as possible while still being able to make the first section (Not only does this give you maximum speed, it also ensures your wave priority, guaranteeing a best-case scenario for the ride).
2. TIMING
Bottom turn timing sets up the rhythm of the whole rest of the ride. The simple secret is to hit the turn at the moment of maximum speed, says Shane Dorian: It’s easy to say, but takes a thousand practice runs to perfect. And on the subject of practicing, any wave offers you an opportunity to rehearse a bottom turn. If it’s a closeout, try timing when the wave shuts down and use the speed to feel the move. Lifelong surfer and lifeguard Rich Chew says he used to go out after school and do a hundred bottom turns just to get the one move down. And he became the Men’s U.S. Champion a year later.
3. SPRING
Often it is advantageous to stay in the squat position you are in as you leap to your feet on the take-off. Remaining in a crouch on the drop reduces wind resistance, helps keep your balance and provides a critical element to the bottom turn: the spring/drive/thrust of your lower body. Any shot of Tommy Curren, Kelly Slater or Mick Fanning will most likely show a low center of gravity, legs bent tightly, like a well-coiled spring. The speed, power and control these surfers get out of their initial turn provide the basis for everything that comes after.
4. FOOT PLACEMENT
Finding the right spot on your board takes some experimenting as you go, but once you find the ‘sweet spot,’ your confidence will soar. Keep your feet centered over your stringer. You can use it as a line almost like actors use marks on the floor to position themselves for their parts. If your toes are hanging off the rail, you’ll be alright on the frontside rail turn, but as you reverse to the heelside rail you’ll be totally off balance. If you get your weight too far forward, your nose will tend to catch; plus the chest area of the board tends to be the thickest spot, and the most likely to bog down. If you have trouble with finding the right spot for your back foot, a pad placed perfectly in the right spot can give you the instant touch you may need.
5. WEIGHTING AND UN-WEIGHTING
Without powerful commitment on a bottom turn, there’s not much chance things are going to improve from there. Remember: for every action there is an equal and opposite reaction. This means the harder you push, the more projection you’ll get from the turn. But keep in mind if your weight is too far forward, you’ll most likely dig a rail. From the start of the maneuver, hold your back-foot pressure throughout your turn, and then transfer your weight a little more to the front foot toward the end of the turn. You may even feel your board want to slide. This usually means you’ve transferred too much front-foot pressure. Keep your weight too far back, or completely over your fins and you’re likely to spin out. Find the balance point by evenly distributing your weight.
6. PUMP AND DROP
If the wave is walled up on the first section, throw down a few pumps before you drop down the face to turn, so that you get across the walled face and don’t get caught behind the section. Be careful not to lean too hard because you will bury your front rail under water, catch an edge, lose your speed, and faceplant. A fast down-the-line turn like this means putting hard pressure on your rail and then quickly releasing so that the board’s forward momentum continues without deep rail resistance. Think distance, not power.
7. BODY MECHANICS
One of the most important mechanics to remember is the torso rotation on the frontside bottom turn, says Brad Gerlach. Your leading arm and chest needs to pivot parallel to the board. The solar plexus needs to face towards the stringer of your board just before making the turn.
This post was taken from Surfing The Manual: Advanced by Jim Kempton.
Duck diving – 7 tips to avoid obliteration
October 25th, 2011
Before leashes and short boards, the problem of getting outside was even more challenging than today.
During a severe push down while getting rolled by a brutish North Shore set, U.S. National Champion Corky Carroll slammed into something hard, which he thought was the bottom.
Looking down he realized he’d hit a big sea turtle who was also getting pummeled by the wave. I was thinking, ‘Look at that dude grovelling around, he’s in trouble.’ recalls Corky. ‘Then, with my lightning-quick mind, I realized that if he was in trouble then I must be in bigger trouble. He’s a turtle.’
So, doing the manly thing, Corky grabbed on and pulled himself up, launching for the surface from the top of his shell. Of course this stuffed the turtle even deeper.
‘When the turtle surfaced some seconds later he was just glaring at me,’ Corky remembers. ‘All I could do is look back sheepishly. He was one pissed-off tortoise.’
DUCK DIVING DONE DEFTLY
You see a massive wall of white water rumbling towards you, and there’s only one place to go – under it all. If you have ever watched ducks or other water birds navigate a wave you will know where the term comes from. Using their beaks first they simply drive their necks under the breaking wave follow with their bodies and pop out the back with the most natural and elegant motion. The object of the surfer’s duck dive is to do exactly the same. Getting this wired is not that easy, but mastering the duck dive will save endless battering and reduce the number of waves you have to roll substantially.
1. GETTING STARTED
The best way to get a feel for the proper way to really duck dive is to first practice on flat water. Paddle quickly up to speed and prepare to grab the rails about even with the center of your chest. Push off the board, just as if you were taking off, and with your hands wrapped around the rails, shift your body weight, position forward and bury the nose as deep as possible. Aim for a 45-degree angle of penetration. Deeper usually is better, but in most small waves just getting in well under the surface will generally work. Timing is the key element to this maneuver, and without a doubt the hardest part of the sequence, says longtime big-wave expert and Santa Cruz local Richard Schmidt. Getting yourself and the board underwater, away from the falling lip or incoming whitewater is the main objective. The whole sequence needs to be one precise sweep, to escape the lip’s impact and the turbulence just below the surface. Here is the key to the perfect duck dive: it’s a saber arc, down, under and up through the surface again.
2. PUSH IT REAL GOOD
Push all your upper body weight onto your hands and arms until you feel the nose begin to go under. Point your head down and let your body follow. As the nose submerges, slip your dominant leg forward, arching onto your toes. This will pull your butt into the air as high as possible. Just as your board begins to reach the bottom of the pendulum swing, bend your dominant leg and use that knee – or better yet, the ball of your foot – to push the tail under the water also.
3. LEAN INTO IT
To maximize your leverage, throw your other leg into a frog-kick behind you. Continue to push down against the tail with the toes of your leading or dominant foot. At this point you should be in a crab-like position over your board. The board is completely underwater, one leg arched above you. Timing is critical here. Each wave will configure the components differently: speed, thickness of lip, depth of the bottom, and you need to time it so you get your body under before the lip hits you. Remember to take a quick breath before going under.
4. THAT’S USING YOUR HEAD
Lead with your head (just like a duck) and pull your body underwater, pulling the board towards you. Simultaneously pull your arched back leg forward to add to the downward momentum. Maintain the momentum gained from driving the nose down under, thrusting forward and kicking with your back foot, while still pushing down on the tail with your dominant foot. Get the feel of where the sweet spot is to get maximum leverage from the foot and toes.
5. PRACTICE MAKES PERFECT
Practice this until you can do the whole sequence in a singular flowing motion. The perfect duck dive uses your board and body as a pendulum, swinging under the wave in one fluid swooping movement. It takes time, and it’s a pain in the ass, says Joel Parkinson. But when you get it wired, and you’re trying to get out on a big day, it can be so rewarding.
6. KEEP IN MIND
As you move into the big stuff, remember to build up as much forward paddling speed as possible. Avoid where the lip is directly throwing out; try to paddle toward the part of the wave that has already broken or a spot on the wave wall that is steep but not right where the lip is landing. As the wave goes over you, push down on the tail with either your knee or foot. Your board should now be horizontal, a couple of feet underwater and powering through the bottom of its arc.
7. EYES WIDE OPEN
Whenever you can, if the water is clear enough, open your eyes to look for an area that has less turbulence and aim to pop up there. This point should be timed so that the bulk of the turbulence is above you. The energy of the wave should now be pushing you back towards the surface. Maintain momentum and arch upwards using the buoyant property of your board and body to complete the swing of pendulum, and break the surface behind the wave.
This post was taken from Surfing The Manual: Advanced by Jim Kempton.
5 categories of surfboard
December 24th, 2010
Knowledge is power and gives you more aptitude in making correct choices when buying a new surfboard. Communicating what you want and need for your surfing experience is key to picking up great custom made surfboard equipment. Popular surfboard manufacturer’s websites are a free and convenient way to start checking out what surfboard designs are available and popular in the surf world.

For general information purposes, the following guide can be used for five generalised design categories:
1. High Performance Designs
This design category is used for those with more advanced surfing abilities such as pro riders like Kelly Slater, Joel Parkinson, Taj Burrows and other well known world class pro surfers, and also for advanced ability surfers looking for high performance in all styles and extremes of surf throughout the world.
2. Alternative Hybrid Designs
This category is a middle ground crossover between high-performance designs and retro-style designs. Note that this category, along with the retro designs, has become increasingly popular in the last few years with the surfboard buying public throughout the world.
3. Retro Designs
This category is based on previous board designs over the past 35 years of surfing history and features many models designed and built in the fashion of their time, including resin colour tinted fibreglass layups along with glossed and polished finishes. These board designs can also be traditionally glassed as clear lay-up as well, with a more traditional sanded satin-finish on the finished product.
4. Hybrid Mini-Longboard Designs
This category describes hybrid designs morphed between alternative hybrid design and high-performance longboard design. These models can be easier to ride than most traditional small board designs, and can help the rider to catch waves easily, even with their overall smaller-than-longboard size, and are generally designed for smaller, softer breaking waves. This feature also makes this category a great design for the beginner or the older surfer looking for a fun session when the surf is below average in wave height.
5. Longboard Designs
This category includes traditional longboard and high-performance longboard designs. These models have been known to be extremely easy to ride and catch waves with, and are generally designed for smaller, soft breaking wave. This feature makes the category a favourite design of beginners or older surfers looking for a fun ride in any conditions year round.
Content taken from “Surfing The Manual: Advanced“, check it out for more tips and tricks from the very best.
